COVID-19 Update: How Atlas Supply, a Beacon company, is staying safe and continuing to serve our customers. Click to learn more...

How To Operate An Albion® Engineering Rover Backer Rod Installer

Albion Engineering 1051-1 Rover Backer Rod Installer ready for operation

Watch how to operate an Albion Engineering Rover Backer Rod Installer (Video Transcript). Then learn more about the materials, tools and accessories required to operate safely and efficiently.

Albion Engineering Rover Backer Rod Installer Operation Video Transcript

  • Achieve higher speed, quality, productivity, craftsmanship, and consistency than the traditional labor intensive method
  • Three passes are required along with downward force from the operator
  • [Supplemental Description:]
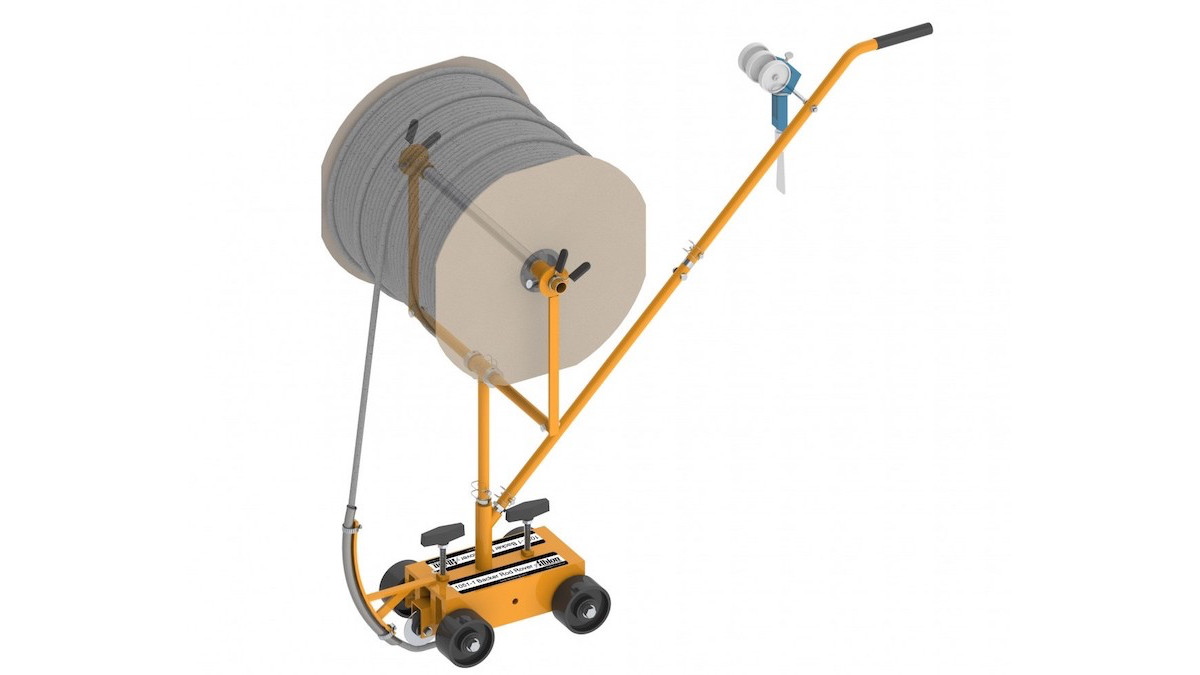
    • A single operator walks behind the Rover, pushing it forward. The Rover continuously inserts backer rod into a concrete floor expansion joint at a consistent depth, while feeding backer rod from an integrally mounted spool.
    • The operator breaks the backer rod at the end of a run and uses a Backer Rod Insertion Tool to finish the process of inserting and cutting the backer rod to length.
    • A similar procedure occurs at the start of a run. The operator uses the Rover to insert a short section of backer rod, stops, and uses the Backer Rod Insertion Tool to finish the new starting point, before resuming operation.
    • The single operator repeats the entire process for each section of concrete expansion joint.
  • Lightweight, portable and easy to set up
  • Larger wheel / hose for larger backer rod
  • Easy to get around manholes and other obstacles

Rover Backer Rod Installer Operation Materials, Tools and Accessories

Materials, Tools and Accessories – Shown

  • Backer Rod – Closed-cell, polyethylene foam, joint filler, 1/8 to 1-inch diameter
  • Albion Engineering Standard Model Backer Rod Insertion Tool – 640-5 with optional telescopic extension pole
  • Albion Engineering Rover Backer Rod Installer
  • Albion Engineering Backer Rod Insertion Tool – 640-4 Road Model with a reinforced resin handle to withstand rough use on horizontal surfaces.

Citations


How To Apply MasterProtect® HB 400 Coating

MasterProtect HB 400 water-based, high-build, waterproof coating in a 5 gallon pail
MasterProtect HB 400 Water-Based, High-Build, 100% Acrylic, Waterproof Coating packaged in 5 gallon pail

Watch how to apply MasterProtect HB 400 water-based, high-build, 100% acrylic, waterproof coating (Video Transcript). Then learn more about the materials, tools and accessories required to do the job safely and efficiently.

MasterProtect HB 400 Coating Application Video Transcript

  • How To Apply MasterProtect HB 400 Coating
  • Ensure substrate is structurally sound, fully cured, dry and clean
  • Mix thoroughly before applying. Apply by brush, roller or sprayer.
  • Apply coating using an ‘N’ pattern
  • Cross-roll through coating to ensure uniform wet mil thickness
  • Check wet film thickness to ensure application at specified rate
  • Back-roll in same direction to create a uniform appearance
  • Refer to the MasterProtect HB 400 technical data guide for more information.

Coating Application Materials, Tools and Accessories

Materials, Tools and Accessories – Shown

  • Protective Gloves – 4-mil nitrile, disposable glove
  • Protective Clothing – Long-sleeve sweatshirt
  • MasterProtect HB 400 Coating – For above-grade concrete, masonry, stucco, and EIFS
  • Low Speed Drill
  • Coating Mixing Paddle – Double ribbon agitator
  • Roller – Adjustable handle and 3/4 – 1 1/4 inch nap roller cover
  • Wet Film Thickness Gauge/Comb.

Precautionary Accessories – Not Shown

Refer to the MasterProtect HB 400 Safety Data Sheet (SDS) for more information.

  • Eye Protection
  • Face Protection
  • Respiratory Protection – In case of inadequate ventilation.

Citations


How To Apply MasterProtect® EL 750 Coating

MasterProtect EL 750 water-based, elastomeric, waterproof coating in a 5 gallon pail
MasterProtect EL 750 Water-Based, Elastomeric, 100% Acrylic Waterproof Coating packaged in 5 gallon pail

Watch how to apply MasterProtect EL 750 water-based, elastomeric, 100% acrylic waterproof coating (Video Transcript). Then learn more about the materials, tools and accessories required to do the job safely and efficiently.

MasterProtect EL 750 Elastomeric Coating Application Video Transcript

  • How To Apply MasterProtect EL 750 Coating
  • Ensure substrate is structurally sound, fully cured, dry and clean
  • Mix thoroughly before applying. Apply by brush, roller or sprayer.
  • Apply coating using an ‘N’ pattern
  • Cross-roll through coating to ensure uniform wet mil thickness
  • Check wet film thickness to ensure application at specified rate
  • Back-roll in same direction to create a uniform appearance
  • Refer to the MasterProtect EL 750 technical data guide for more information.

Coating Application Materials, Tools and Accessories

Materials, Tools and Accessories – Shown

  • Protective Gloves – 4-mil nitrile, disposable glove
  • Protective Clothing – Long-sleeve sweatshirt
  • MasterProtect EL 750 Elastomeric Coating – For above-grade concrete, masonry, stucco, and EIFS
  • Low Speed Drill
  • Coating Mixing Paddle – Double ribbon agitator
  • Roller – Adjustable handle and 3/4 – 1 1/4 inch nap roller cover
  • Wet Film Thickness Gauge/Comb.

Precautionary Accessories – Not Shown

Refer to the MasterProtect EL 750 Safety Data Sheet (SDS) for more information.

  • Eye Protection
  • Face Protection
  • Respiratory Protection – In case of inadequate ventilation.

Citations


How To Apply MasterProtect® H 400 Sealer

MasterProtect H 400 water-based, 40% silane, penetrating sealer packaged in 5 gallon pail
MasterProtect H 400 Water-Based, 40% Silane, Penetrating Sealer packaged in 5 gallon pail

Watch how to apply MasterProtect H 400 water-based, 40% silane, penetrating sealer (Video Transcript). Then learn more about the materials, tools and accessories required to do the job safely and efficiently.

MasterProtect H 400 Sealer Application Video Transcript

  • Mix material thoroughly before and during the application
  • Ensure substrate is structurally sound, fully cured, dry and clean
  • Open spout on top of pail, remove tab inside spout
  • Pour into low-pressure, non-atomizing sprayer
  • Flood the surface, starting at the bottom and moving up
  • Achieve a controlled rundown of 8-10 inches
  • Refer to the MasterProtect H 400 technical data guide for more information.

Sealer Application Materials, Tools and Accessories

Materials, Tools and Accessories – Shown

  • Protective Gloves – 4-mil nitrile, disposable glove
  • Protective Clothing – Long-sleeve sweatshirt
  • MasterProtect H 400 Sealer – provides long-lasting protection against moisture intrusion, freeze/thaw cycles, and chloride intrusion
  • Low-Pressure, Non-Atomizing Sprayer.

Precautionary Accessories – Not Shown

Refer to the MasterProtect H 400 Safety Data Sheet (SDS) for more information.

  • Eye Protection
  • Face Protection
  • Respiratory Protection – In case of inadequate ventilation.

Citations