COVID-19 Update: How Atlas Supply, a Beacon company, is staying safe and continuing to serve our customers. Click to learn more...

How To Apply MasterEmaco® T 545 Repair Mortar

MasterEmaco T 545 Chemical Action Repair Mortar packaged in a 50 pound bag

Watch how to apply MasterEmaco T 545 chemical action repair mortar (Video Transcript). Then learn more about the materials, tools and accessories required to do the job safely and efficiently.

MasterEmaco T 545 Repair Mortar Application Video Transcript

  • Concrete must be structurally sound and fully cured. Surface should be prepared following current ICRI Guideline No. 310.2R surface preparation guide.
  • Add 4 pints (1.9 L) of potable water into a clean mixing container
  • Gradually sift in powder, 1/3 of the bag at a time, while mixing continuously at a slow speed
  • Mix material for 90 seconds to ensure a uniform, lump-free consistency
  • Work material firmly into the bottom and sides of patch. Avoid feather edging.
  • Placement time is approximately 5 minutes
  • Level MasterEmaco T 545 and screed to the elevation of surrounding concrete. Minimal finishing is required.
  • No curing is required. Protect from rain immediately after placing.
  • Refer to the MasterEmaco T 545 technical data guide for more information.

Repair Mortar Application Materials, Tools and Accessories

Materials, Tools and Accessories – Shown

  • Protective Gloves – 4-mil nitrile, disposable glove
  • Protective Clothing – Long-sleeve sweatshirt
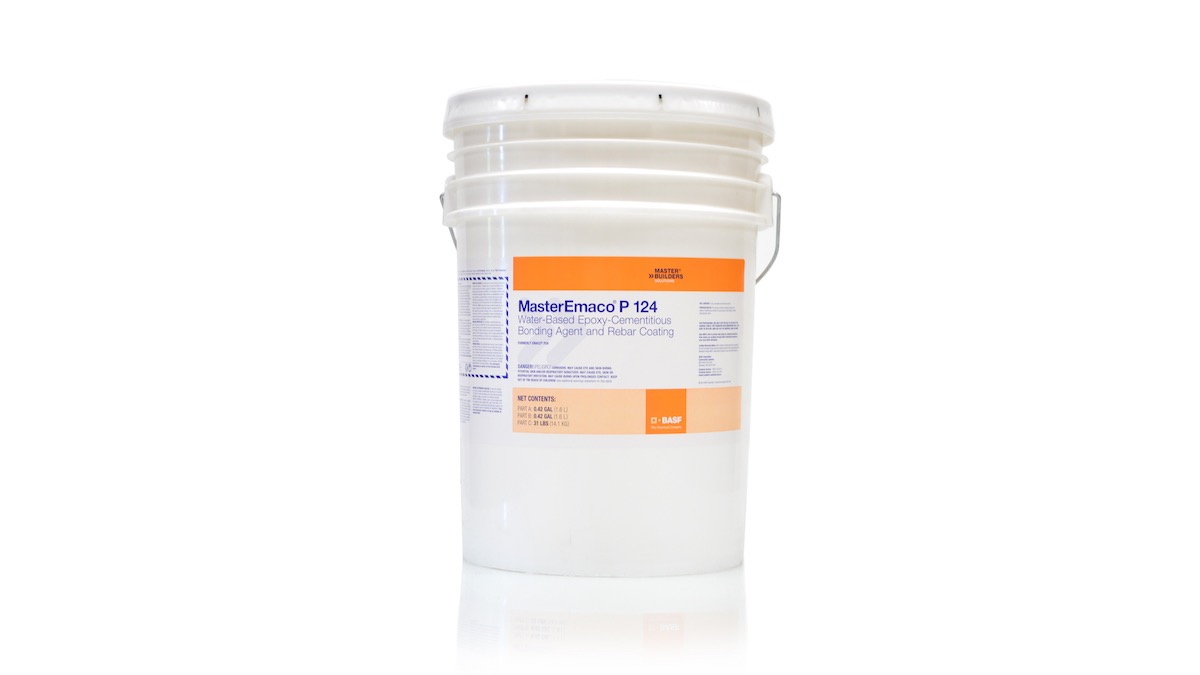
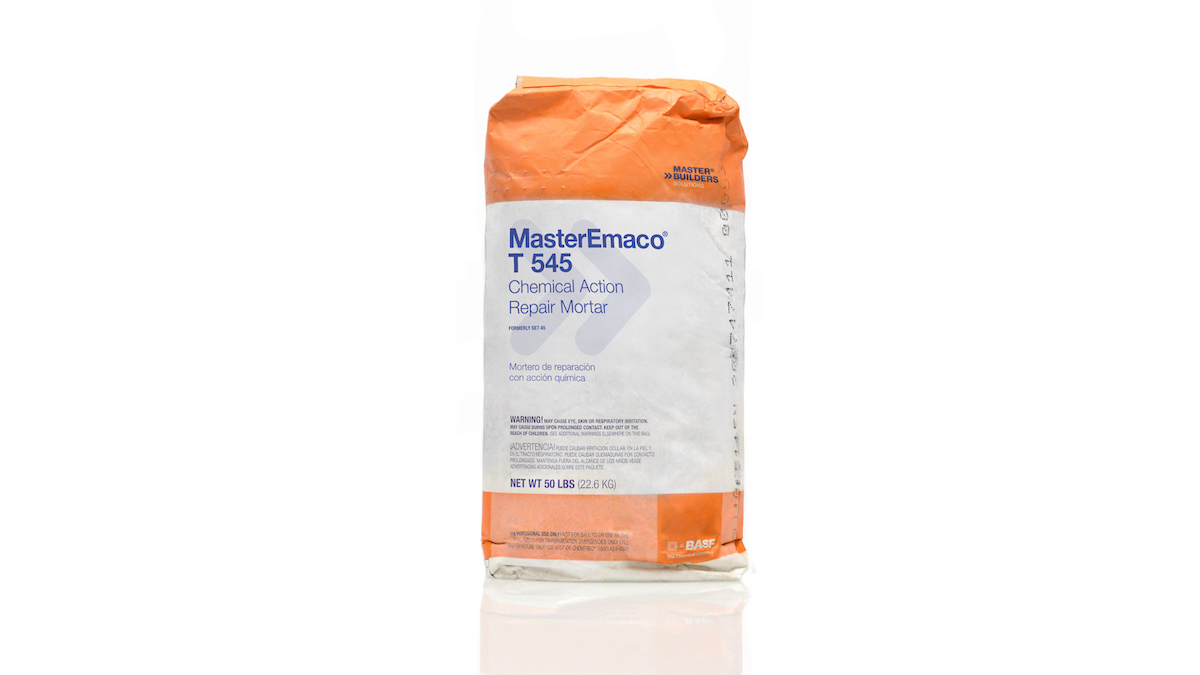
  • MasterEmaco T 545 Repair Mortar – Very rapid-setting, chemical action, repair mortar
  • Mixing Container
  • Cordless Drill
  • Mixing Paddle
  • 2″ x 4″ Screed Board.

Precautionary Accessories – Not Shown

Refer to the MasterEmaco T 545 Safety Data Sheet (SDS) for more information.

  • Eye Protection
  • Face Protection
  • Respiratory Protection – In case of inadequate ventilation.

Citations


How To Apply MasterEmaco® P 124 Primer

MasterEmaco P 124 Steel Reinforcement Primer & Bonding Agent, 6-gallon kit package
MasterEmaco P 124 Steel Reinforcement Primer & Bonding Agent packaged in a 6-gallon kit

Watch how to apply MasterEmaco P 124 steel reinforcement primer and bonding agent (Video Transcript). Then learn more about the materials, tools and accessories required to do the job safely and efficiently.

MasterEmaco P 124 Primer Application Video Transcript

  • Concrete must be structurally sound and fully cured
  • Remove all oxidation and scale from the exposed reinforcing steel in accordance with Technical Guide No. 310.1R
  • Surface to be repaired must be saturated-surface dry (SSD) prior to the application of MasterEmaco P124, when used as a bonding agent with ICRI Technical Guide No. 310.1R
  • Precondition all components to 70 degrees Fahrenheit (21 degrees Celsius)
  • Pour contents of Part A and Part B into a clean mixing bucket
  • Blend the components for 2 minutes
  • Slowly add all of Part C. Use the appropriate drill paddle to thoroughly mix the components.
  • Apply MasterEmaco P 124 using a stiff brush or broom
  • Work the bonding agent thoroughly into the substrate
  • When applying to rebar, two coats of 10 mils (0.25 mm) are required
  • Protect the bonding agent from direct sunlight and temperature above 95 degrees Fahrenheit (35 degrees Celsius)
  • Refer to the MasterEmaco P 124 technical data guide for more information.

Primer Application Materials, Tools and Accessories

Materials, Tools and Accessories – Shown

  • Protective Gloves – 4-mil nitrile, disposable glove
  • Protective Clothing – Long-sleeve sweatshirt
  • MasterEmaco P 124 Primer – Water-based epoxy-cementitious bonding agent, also used to coat and protect rebar
  • Cordless Drill
  • Paddle – Jiffy Mixer or similar
  • Drill Attachment/Brush
  • Brush.

Precautionary Accessories – Not Shown

Refer to the MasterEmaco P 124 Safety Data Sheet (SDS) for more information.

  • Eye Protection
  • Face Protection
  • Respiratory Protection – In case of inadequate ventilation.

Citations


How To Operate An Albion® Engineering Rover Backer Rod Installer

Albion Engineering 1051-1 Rover Backer Rod Installer ready for operation

Watch how to operate an Albion Engineering Rover Backer Rod Installer (Video Transcript). Then learn more about the materials, tools and accessories required to operate safely and efficiently.

Albion Engineering Rover Backer Rod Installer Operation Video Transcript

  • Achieve higher speed, quality, productivity, craftsmanship, and consistency than the traditional labor intensive method
  • Three passes are required along with downward force from the operator
  • [Supplemental Description:]
    • A single operator walks behind the Rover, pushing it forward. The Rover continuously inserts backer rod into a concrete floor expansion joint at a consistent depth, while feeding backer rod from an integrally mounted spool.
    • The operator breaks the backer rod at the end of a run and uses a Backer Rod Insertion Tool to finish the process of inserting and cutting the backer rod to length.
    • A similar procedure occurs at the start of a run. The operator uses the Rover to insert a short section of backer rod, stops, and uses the Backer Rod Insertion Tool to finish the new starting point, before resuming operation.
    • The single operator repeats the entire process for each section of concrete expansion joint.
  • Lightweight, portable and easy to set up
  • Larger wheel / hose for larger backer rod
  • Easy to get around manholes and other obstacles

Rover Backer Rod Installer Operation Materials, Tools and Accessories

Materials, Tools and Accessories – Shown

  • Backer Rod – Closed-cell, polyethylene foam, joint filler, 1/8 to 1-inch diameter
  • Albion Engineering Standard Model Backer Rod Insertion Tool – 640-5 with optional telescopic extension pole
  • Albion Engineering Rover Backer Rod Installer
  • Albion Engineering Backer Rod Insertion Tool – 640-4 Road Model with a reinforced resin handle to withstand rough use on horizontal surfaces.

Citations


How To Apply MasterProtect® HB 400 Coating

MasterProtect HB 400 water-based, high-build, waterproof coating in a 5 gallon pail
MasterProtect HB 400 Water-Based, High-Build, 100% Acrylic, Waterproof Coating packaged in 5 gallon pail

Watch how to apply MasterProtect HB 400 water-based, high-build, 100% acrylic, waterproof coating (Video Transcript). Then learn more about the materials, tools and accessories required to do the job safely and efficiently.

MasterProtect HB 400 Coating Application Video Transcript

  • How To Apply MasterProtect HB 400 Coating
  • Ensure substrate is structurally sound, fully cured, dry and clean
  • Mix thoroughly before applying. Apply by brush, roller or sprayer.
  • Apply coating using an ‘N’ pattern
  • Cross-roll through coating to ensure uniform wet mil thickness
  • Check wet film thickness to ensure application at specified rate
  • Back-roll in same direction to create a uniform appearance
  • Refer to the MasterProtect HB 400 technical data guide for more information.

Coating Application Materials, Tools and Accessories

Materials, Tools and Accessories – Shown

  • Protective Gloves – 4-mil nitrile, disposable glove
  • Protective Clothing – Long-sleeve sweatshirt
  • MasterProtect HB 400 Coating – For above-grade concrete, masonry, stucco, and EIFS
  • Low Speed Drill
  • Coating Mixing Paddle – Double ribbon agitator
  • Roller – Adjustable handle and 3/4 – 1 1/4 inch nap roller cover
  • Wet Film Thickness Gauge/Comb.

Precautionary Accessories – Not Shown

Refer to the MasterProtect HB 400 Safety Data Sheet (SDS) for more information.

  • Eye Protection
  • Face Protection
  • Respiratory Protection – In case of inadequate ventilation.

Citations